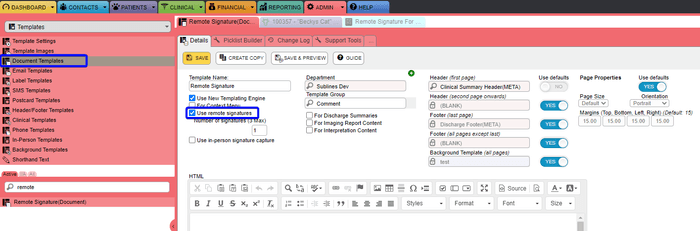
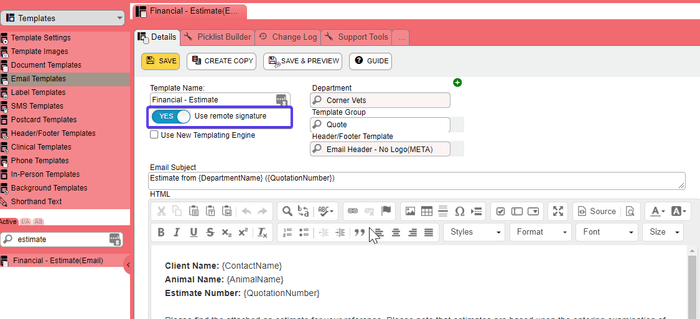
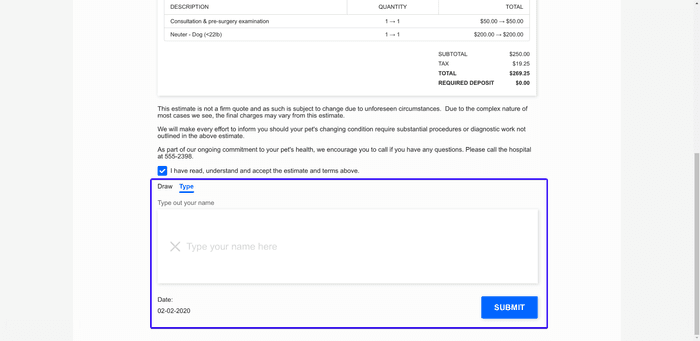
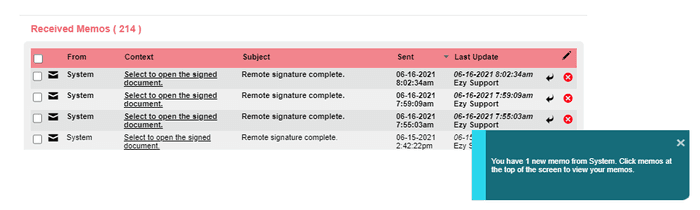
Remote Signatures

Join the paperless movement and say goodbye to unnecessary printing. Introducing our newly updated feature, remote signatures. Providing your clients the freedom to sign any documents from the comfort of their own home, creating a seamless, contactless experience

Streamline your workflows + Support webinar

Time-saving in a busy practice is crucial, and being able to obtain electronic signatures from clients not only saves administration time but also saves time for your client when they're in your practice, creating a better customer experience.

Other key benefits for adopting the remote signatures features are:

  1. Streamlined workflow: less administration time needed to print, scan and upload physical documents
  2. No more storerooms stocked to the brim with files: eliminate the space, cost, and time with paper archiving
  3. Cutdown the document signing process: enable faster signing between your customers, helping to reduce signer drop-off rates
Step 1

Step One: Set up a document to receive a remote signature

  1. Navigate to Templates (Admin > Templates > Document Templates) and choose a template you would like to receive a remote signature for
  2. Tick the use remote signature option and select how many signatures you'll need in the document, there is a maximum of 3 per document
  3. Add the #WEBFORM-SIGNATURE# variable wherever the document needs a client signature
Step 2

Step Two: Set up an email/SMS template with a Remote Signature document

  1. Navigate to the Email Template or SMS Template (Admin > Templates > Email Template or SMS Template)
  2. Select the email/SMS template you want to use from the list in the left sidebar
  3. Toggle the use remote signature option to YES
  4. Note that the #REMOTE-SIGNATURE-LINK# variable is automatically added to the document, feel free to move this to wherever works best

Step Three: Send a document for the client to sign

  1. When sending a document to a customer, for example, an estimate, select Create Document and select the document template you have enabled for remote signatures in step one
  2. Select Send for Signature and choose either send an email or send SMS
  3. In the New Communication window, choose the email template that you set up in step two
  4. Enter the document's destination; your clients email address or phone number
  5. Then press send
Step 4

What is the client experience?

  1. Your client will receive an email or SMS with a link to the document
  2. They will work their way through the document completing any applicable fields and accessing the signature fields where they can draw or type in their signature
  3. Once completed, they will hit submit
  4. Your client then has the option to print or save as a PDF for their own records
Remote Signatures Memos

What happens once the document is signed?

  1. You will receive a memo with a link to advise you the form has been signed by your client
  2. It will open the relevant patient record and display it underneath attachments