Clinical Layout 840 700

Clinical Layouts

Introducing our latest feature update custom clinical layouts - simplifying how you use clinical records. Get creative and configure as many layouts as you like, then attach them to a specific appointment type, it's that easy to reduce the noise and only see the clinical record sections you need!

What to expect with clinical Layouts

Clinical layouts allow you to dictate which sections of the clinical record are visible and can be defaulted from an appointment type or set directly on the clinical record. This is a first step forward in customizing your workflows and simplifying the clinical record, particularly for those simple repetitive visits.

  • Streamline your team's consultation workflow - create a simplified workflow to stop your team from getting lost in the busy clinical record and helping them stay on track during appointments.
  • Increased customization - creating clinical layouts that best suit the types of appointments your practices uses.
  • Default clinical layout - create a default clinical template for each of the sections you make visible
  • Save time - spending less time within the clinical record due to a simplified format allows you to get back to what matters. Caring for patients.
Clinical Layout creation Gif

Step One: Make a clinical layout

1. Navigate to layouts (Admin > Clinical > Layouts)

2. In the General section, name your new clinical layout, then add an order number you would like the layout to appear. The order box controls the order the clinical layouts show within the drop-down menu as shown in step two.

Note: If your site does not use a department configuration, ezyVet does not show the Department box.

3. Finally work your way through the clinical sections and simply toggle the options to NO for any section you don't want to include. Meaning the sections toggled YES will be the default display for your new custom clinical layout.

Clinical Layout with appointment Gif

Step Two: Attach your new clinical layout to an appointment type

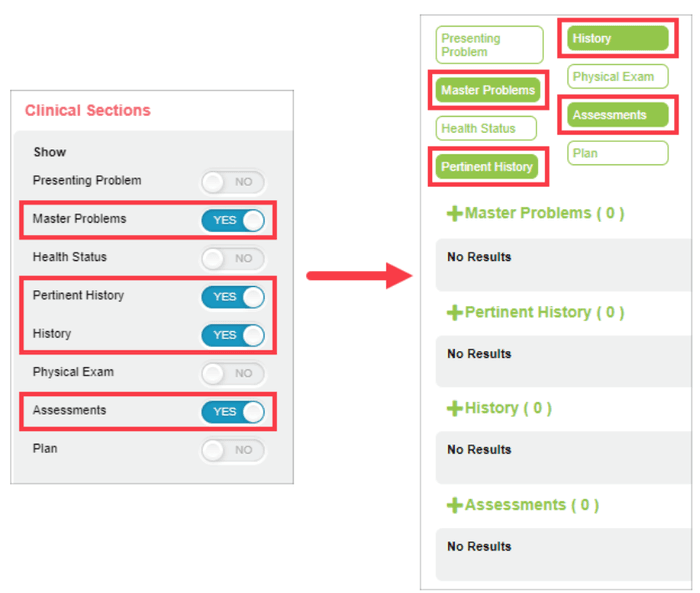
Once you have created your custom clinical layout, the next step is to attach the clinical layout to a specific appointment type, for example, when a vaccination appointment is scheduled, your simplified clinical layout appears in the Clinical Record ready for the appointment.

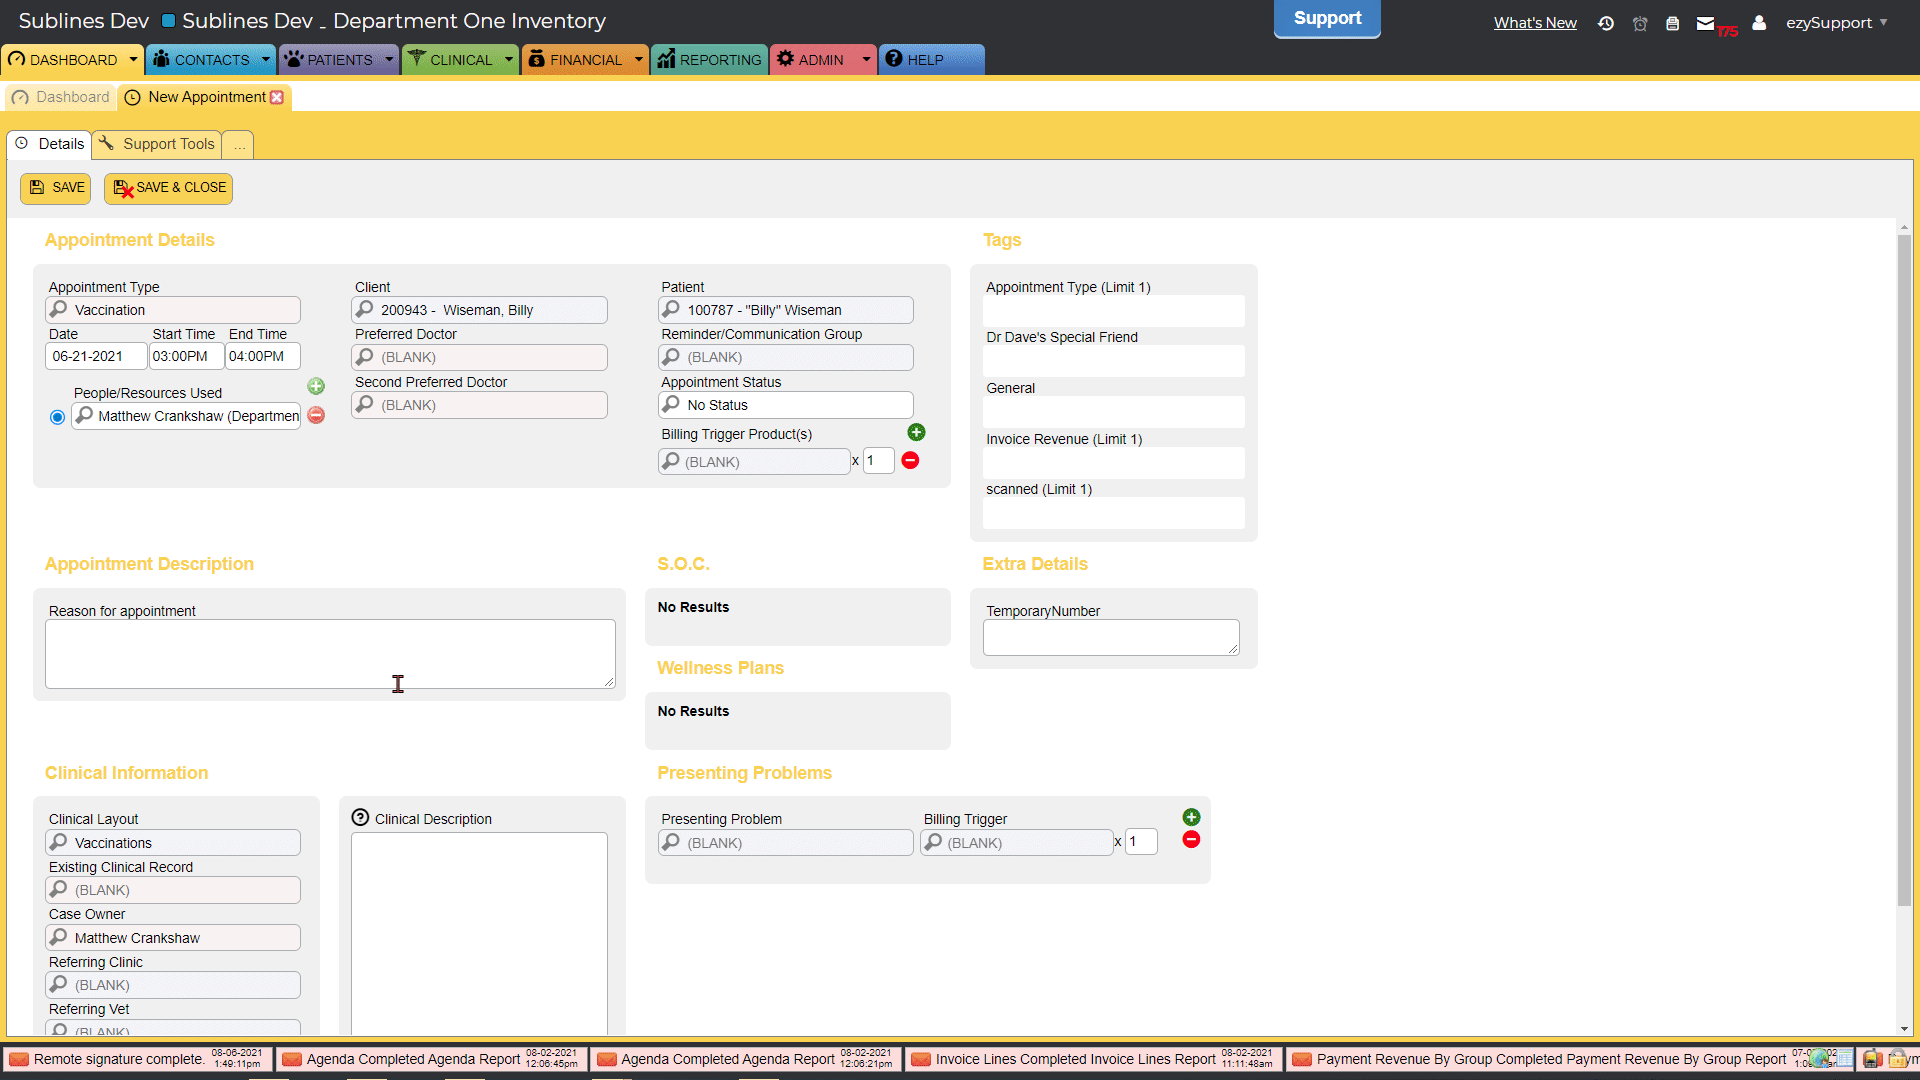
1. Navigate to appointment types (Admin > Settings > Appointment Types).

2. You will see a list of your existing appointment types, select the relevant appointment type you would like to attach your clinical layout too.

3. Scroll down the page until you find the Properties section. In the Properties section toggle on Needs a clinical record to YES.

4. Lastly, within the Default Clinical Layout box, select the applicable clinical layout and then press save.